Adding CMS component in Hybris
When we say we need to add new CMS component to a page, it could be any one of these 2
1) Adding CMS component of existing component type like CMSParagraphComponent,CMSImageComponent , MiniCartComponent etc.
2) Adding CMS component of completely new component type apart from what is provided in Hybris.
Let’s see the first option for now
Let’s say our requirement is to add a new component in Homepage which displays Welcome to the user.
I am using Apparel site for achieving it.
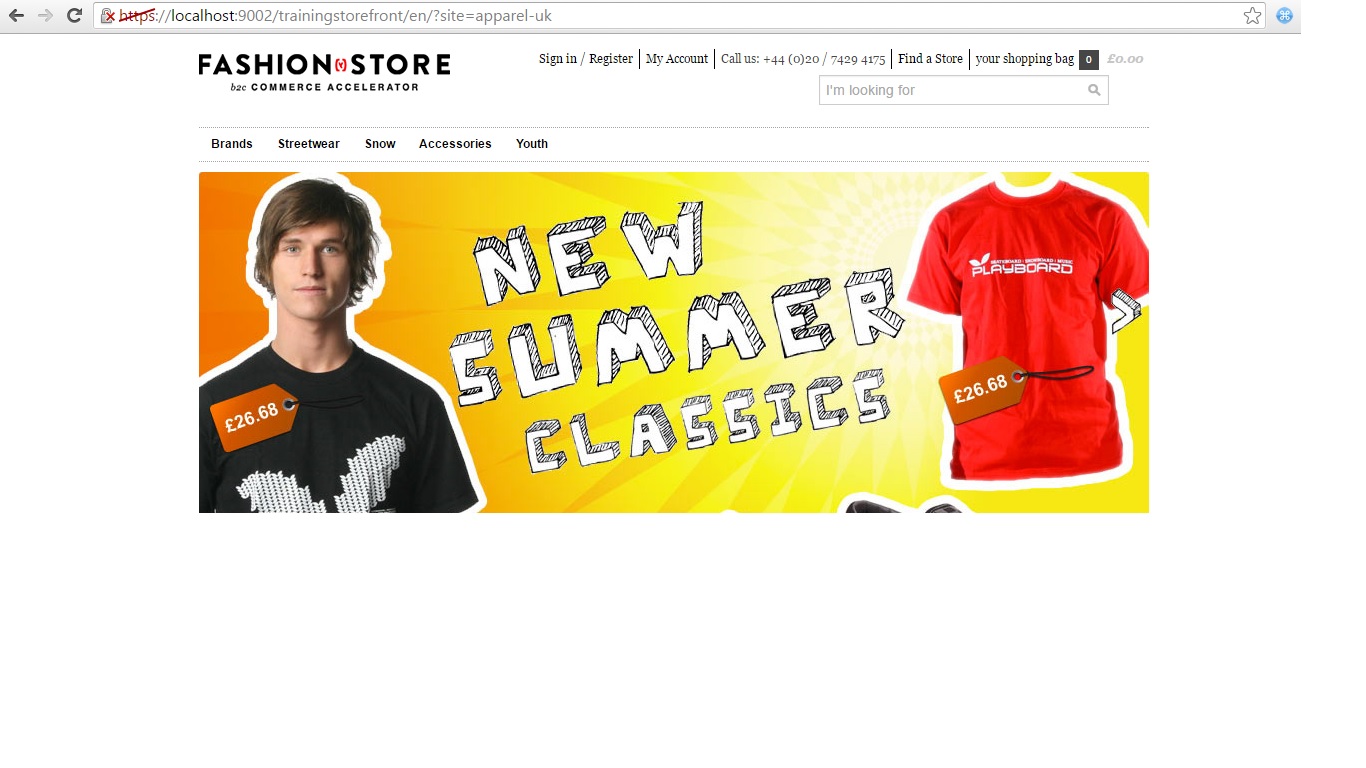
This is our home page before implementing this requirement
What are the steps to achieve this?
1)Decide what type of existing component we need to use for this requirement.
I am going to use CMSParagraphComponent existing type
2)Write an impex statement for adding this new component item type instance.
Note: Since it’s an existing component type, we don’t need to create the controller and jsp for this component
3)Write an impex to link it to the appropriate content slot
4)Run the impexes and make sure to synchronize from Staged to Online(or else run impex with directly online version, only for testing purpose)
5)Modify home page related jsp to have cms tags for new content slot
6)Open the Home page and Verify the page to check new component
Step 1
We have already decided to use new component as of type CMSParagraphComponent as we need to display just a Welcome text.
Step 2
In this step, we need to define the component type instance using the impex as below
- INSERT_UPDATE CMSParagraphComponent;$contentCV[unique=true];uid[unique=true];name;&componentRef;;;;content;
- ;;welcomeInfoComponent;Welcome information;welcomeInfoComponent;;;;welcome to home page;
INSERT_UPDATE CMSParagraphComponent;$contentCV[unique=true];uid[unique=true];name;&componentRef;;;;content;
;;welcomeInfoComponent;Welcome information;welcomeInfoComponent;;;;welcome to home page;
Add the above impex to cms-content.impex file
(hybris\bin\ext-data\apparelstore\resources\apparelstore\import\sampledata\contentCatalogs\apparel-ukContentCatalog\cms-content.impex)
In this Impex,we have defined uid of our new Paragraph component as welcomeInfoComponent which is used to link it to the content slot
Step 3
Now let’s add this component to the appropriate content slot
Since we have decided to add this component to the Home Page, let’s check the slots available in Home page.
Then we can either add this component to the existing content slot or we can define the new slot and add it to the new slot.
Let’s define the new content slot for the Home page template
So for templates as we discussed above, we need to add content slot names
Add the below impexes to the cms-content.impex
- INSERT_UPDATE ContentSlotName;name[unique=true];template(uid,$contentCV)[unique=true][default='LandingPage2Template'];validComponentTypes(code);compTypeGroup(code)
- ;welcomeInfo;;;wide
INSERT_UPDATE ContentSlotName;name[unique=true];template(uid,$contentCV)[unique=true][default='LandingPage2Template'];validComponentTypes(code);compTypeGroup(code)
;welcomeInfo;;;wide
Here we have defined the position/content slot name for Home page template
Now define the content slot
- INSERT_UPDATE ContentSlot;$contentCV[unique=true];uid[unique=true];name;active
- ;;welcomeInfoSlot;welcome info slot;true
INSERT_UPDATE ContentSlot;$contentCV[unique=true];uid[unique=true];name;active
;;welcomeInfoSlot;welcome info slot;true
Now define the content slot for template as below to link content slot name and content slot
- INSERT_UPDATE ContentSlotForTemplate;$contentCV[unique=true];uid[unique=true];position[unique=true];pageTemplate(uid,$contentCV)[unique=true][default='LandingPage2Template'];contentSlot(uid,$contentCV)[unique=true];allowOverwrite
- ;;WelcomeInfo-LandingPage2;welcomeInfo;;welcomeInfoSlot;true
INSERT_UPDATE ContentSlotForTemplate;$contentCV[unique=true];uid[unique=true];position[unique=true];pageTemplate(uid,$contentCV)[unique=true][default='LandingPage2Template'];contentSlot(uid,$contentCV)[unique=true];allowOverwrite
;;WelcomeInfo-LandingPage2;welcomeInfo;;welcomeInfoSlot;true
Now define the component to the content slot
Add the below impex to the cms-content.impex file(hybris\bin\ext-data\apparelstore\resources\apparelstore\import\sampledata\contentCatalogs\apparel-ukContentCatalog\cms-content.impex)
- INSERT_UPDATE ContentSlot;$contentCV[unique=true];uid[unique=true];cmsComponents(uid,$contentCV)
- ;;welcomeInfoSlot;welcomeInfoComponent
INSERT_UPDATE ContentSlot;$contentCV[unique=true];uid[unique=true];cmsComponents(uid,$contentCV)
;;welcomeInfoSlot;welcomeInfoComponent
Step 4
Run both the cms-content.impex files and make sure its imported successfully
Synchronize the content catalog after importing the impexes.
Step 5
Add this new slot in the landingLayout2Page.jsp page using CMS tags as below
(\trainingstorefront\web\webroot\WEB-INF\views\desktop\pages\layout\landingLayout2Page.jsp)
- <div class="welcomeInfo">
- <cms:pageSlot position="welcomeInfo" var="feature">
- <cms:component component="${feature}" />
- </cms:pageSlot>
- </div>
<div class="welcomeInfo">
	<cms:pageSlot position="welcomeInfo" var="feature">
				<cms:component component="${feature}" />
	</cms:pageSlot>
	</div>
Note: In JSP we always use ContentSlotName as position
We have defined welcomeInfo as the ContentSlotName, so we are using as it is in JSP for position.
Note: The above CMS tag will call the appropriate default controller and load the appropriate component along with the required model attributes.
Also add the below lines in the helper.css for css changes
(trainingstorefront/web/webroot/_ui/desktop/common/css/helper.css)
- .welcomeInfo{
- font-weight: bold;
- margin-right: 5px;
- color: #0000ff;
- }
.welcomeInfo{
	font-weight: bold;
	margin-right: 5px;
	color: #0000ff;
}
Now Home page has got the new component welcomeInfoComponent under the slot welcomeInfoSlot
Step 6
Open the storefront and check the home page to appear as below
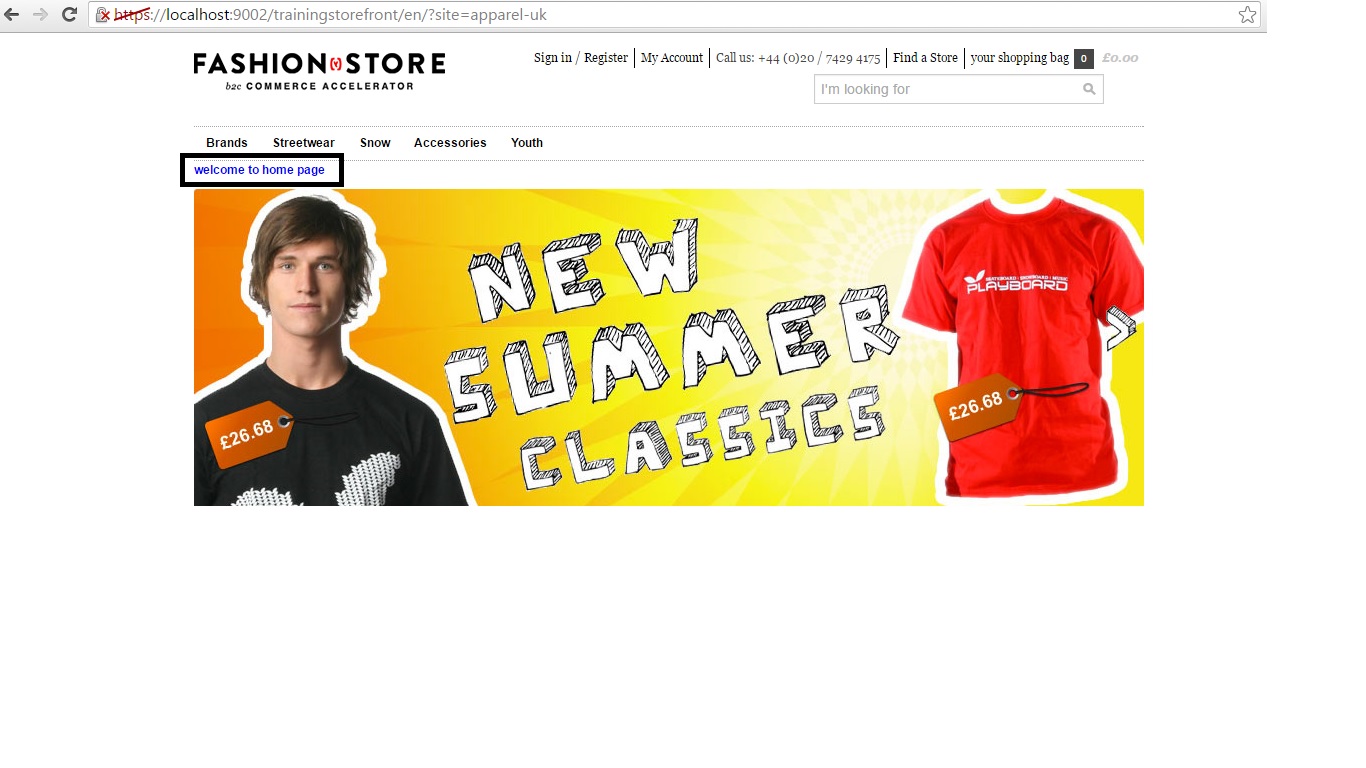
We can see that new component welcome to home page is displayed in the Home Page.
Now how to get this new component in CMS cockpit?
We need to modify the VM files to change the structure of templates in CMS Cockpit.
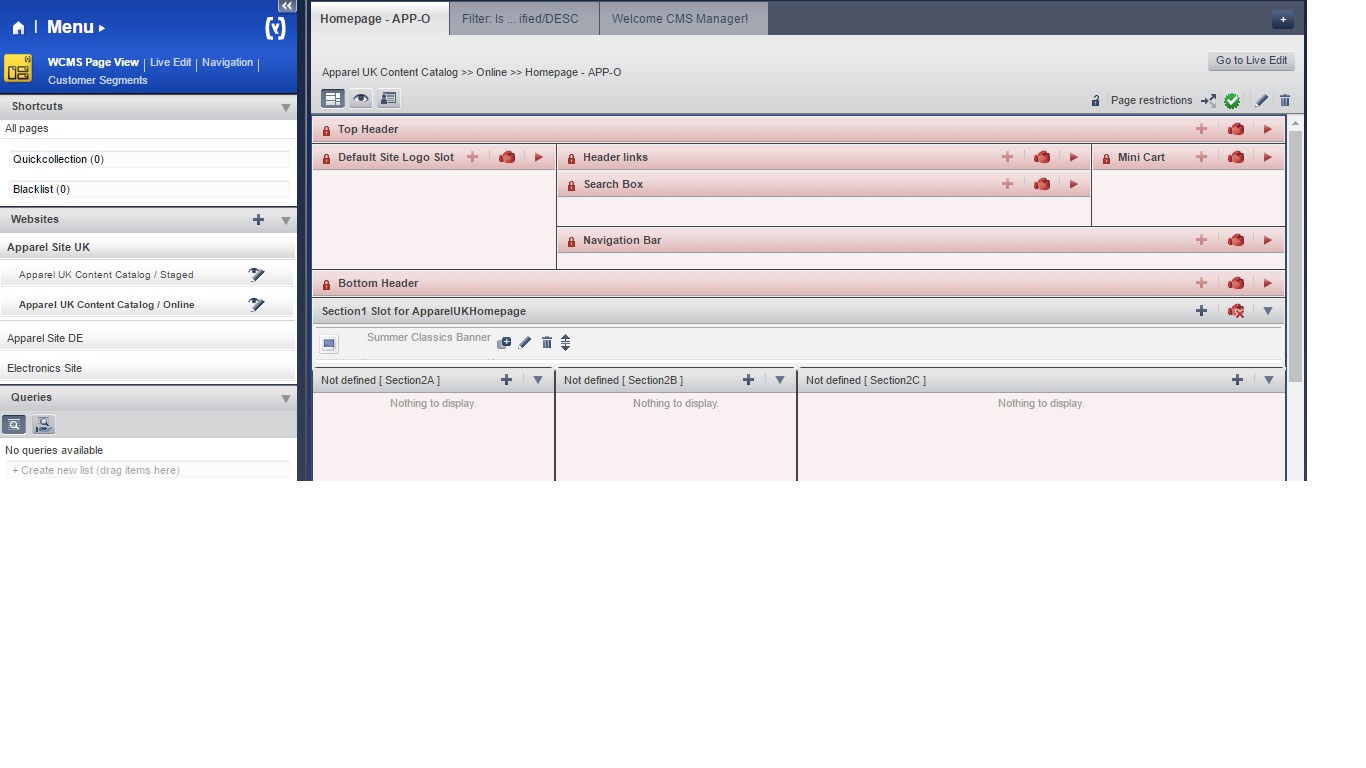
CMS cockpit before modifying the VM file is as below
First we need to open the .vm file for the home page template which is structure_landingPage2Template.vm
(hybris\bin\custom\training\trainingcore\resources\trainingcore\import\cockpits\cmscockpit\structure-view\structure_landingPage2Template.vm)
Add the new content slot in the .vm file as below to display it in the cockpit.
- <tr>
- <td colspan="5" class="structureViewSection">
- <cockpit code="welcomeInfo" />
- </td>
- </tr>
<tr>
<td colspan="5" class="structureViewSection">
<cockpit code="welcomeInfo" />
</td>
</tr>
Add the above code just below the NavigationBar code.
Note: Cockpit code should be same as ContentSlotName
Now run the cms-content.impex(hybris\bin\ext-data\apparelstore\resources\apparelstore\import\coredata\contentCatalogs\apparel-ukContentCatalog\cms-content.impex)
This will load the latest VM file with our modification.
Make sure you synchronize the content catalog after running the impex.
Now access the CMS cockpit and check the Home page
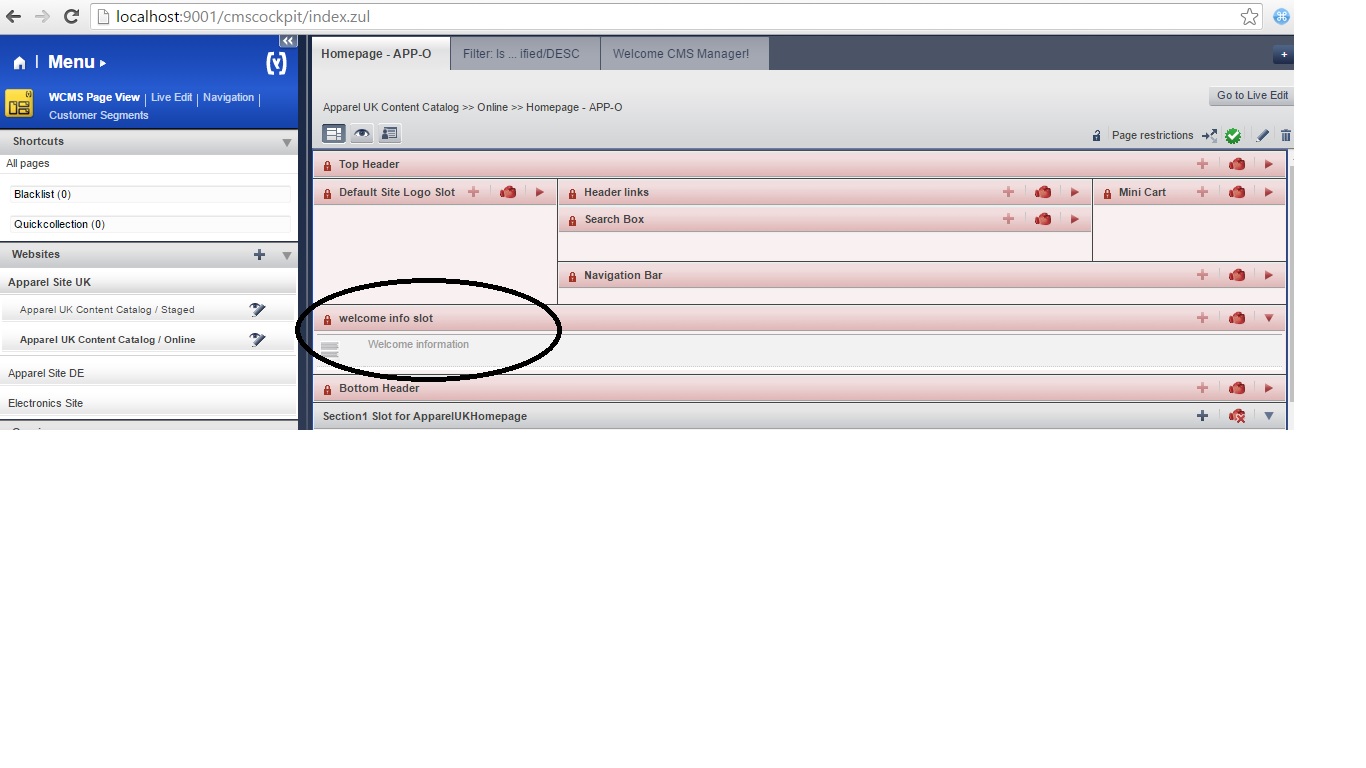
It shows the new content slot added for the page template with the paragraph component added to it.
We can unlock this component and edit it just like any other Paragraph Component

Hi , Actually I am not getting the use of JspIncludeComponent , can you please help me on this why and when we should go for this component.
Hi Karibasappa G C,
I am getting below error in creating a component.
What is $contentCV here? Can you please explain.
INSERT_UPDATE CMSParagraphComponent;$contentCV[unique=true];uid[unique=true];name;&componentRef;;;;content;;# unknown attribute ‘$contentCV’ in header ‘INSERT_UPDATE CMSParagraphComponent’
,,,,unknown attribute ‘$contentCV’ in header ‘INSERT_UPDATE CMSParagraphComponent’;;welcomeInfoComponent;Welcome information;welcomeInfoComponent;;;;welcome to home page;
All WCMS example code will works in 6.7 version sir.plse update
Good explanation
However point 3 and 4 is bit unclear as where to add the impexes in coredata or sample data.
for step 4 we just need to update from HAC ? or is it something else?
Hi,
How do you overides the CMS component jsp in an addon
Hi KB,
First of all – big thanks for your detailed explanations, you really performed great job and we are very grateful to you! 🙂
I have a question. In your example you add just a simple text message “welcome to home page”. And what if I need to add a huge block with images, texts and other elements? For example, can I somehow create jsp or html file with all necessary tags and then insert a link to this file so my newly created CMS component would display that jsp/html file?
Thanks!
Thank you Farsander !!
As per your requirement, you need to create custom component and link that component with jsp if you want to add whole thing as a component.
If you want to provide a link then create a page using page template and return from that controller.
Refer below article for the custom component
http://javainsimpleway.com/how-to-add-new-custom-cms-component-type-to-a-page-in-hybris/
Thanks for your reply! I checked the link about creation of custom component and it is a bit complicated for me because I am Front-End Developer only 🙂
Is there a bit simpler way to add a section? May be in this command:
INSERT_UPDATE CMSParagraphComponent;$contentCV[unique=true];uid[unique=true];name;&componentRef;;;;content;
;;welcomeInfoComponent;Welcome information;welcomeInfoComponent;;;;welcome to home page;
we manually add the text “welcome to home page” to our component, may be there is a way to add a link to jsp-file instead of this text? I found there is JspIncludeComponent, is there a way to use that one instead of CMSParagraphComponent?
Thanks!
So, I have figured out that it is possible to create your own .jsp-file and use it as component. To do that you just need to use following command except CMSParagraphComponent
INSERT_UPDATE JspIncludeComponent;$contentCV[unique=true];uid[unique=true];name;&componentRef;;;;page;
;;welcomeInfoComponent;Welcome information;welcomeInfoComponent;;;;welcomeInfoComponent.jsp;
Note that the file welcomeInfoComponent.jsp must be created in the same folder with the .jsp-file that is responsible for the Page Template we will paste our component into.
Thank you, Karibasappa!! Very helpful tutorial!
Very Impressive and simple explanation
Thank you !!
I am adding the below HTML to the paragraph component but it is not getting rendered, any thoughts !!
Guide’s Choicewith ChromaPop ChromaPop lens technology enhances clarity and natural color to let you live every moment in more detail. Shop Now SHOP NOW Guide’s Choice Howler Matte Tortoise / ChromaPop+ Polarized Bronze Mirror SHOP NOW Guide’s Choice Matte Havana / ChromaPop+ Polarized Brown For the wanderer in everyone. The Rover mountain bike helmet uses Smith’s proven Aerocore construction featuring Koroyd® and clean design targets in on important zonal impact areas. Offering better protection where and when it matters most. Shop Now SHOP NOW Rover Matte Reactor MIPS SHOP NOW PivLock™ Arena Black / ChromaPop Sun Green Mirror PerformanceMeets Style Pro Surfer Tatiana Weston-Webb wearing the Sidney See more detail with ChromaPop, available in our women’s lifestyle sunglass collection. Featuring both timeless shapes and unique silhouettes to suit your style. Discover the Collection SHOP NOW Sidney Crystal Black Block / ChromaPop Polarized Gray Green SHOP NOW Bridgetown Matte Black / Polarized Brown Gradient The Route Helmet Featuring Koroyd® Absorbs 30% more energy than traditional helmets, the Rover bike helmet uses Smith’s proven Aerocore construction featuring Koroyd® and clean design targets in on important zonal impact areas. Offering better protection where and when it matters most. Shop Now SHOP NOW Route Matte Black Cherry MIPS SHOP NOW Route Matte Black The Founder See more detail with Chromapop.Leonardo Fioravanti Shop Now SHOP NOW Founder Howler Matte Tortoise / ChromaPop Polarized Brown SHOP NOW Founder Midnight Matte Honey / ChromaPop Polarized Bronze Mirror
Hi , I see both csv are in same location, meaning its only one csv . i did not get your point that we need to import 2 CSV . I did the changes in same CSV but could not import successfully.
1) My path for CSV : (hybris\bin\ext-data\apparelstore\resources\apparelstore\import\sampledata\contentCatalogs\apparel-ukContentCatalog\cms-content.impex)
What is the other one?
Hi, I did not get your question , Please let me know where i have mentioned “we need to import 2 CSV ?”
You have mentioned:
Step 4
Run both the cms-content.impex files and make sure its imported successfully
Implying that there are two CSV’s.
That’s one from sample data and other from coredata folder
We will generally add template,slot in core data and component and linking to content slot done in sample data.
So need to import both the files.
I will update the path of core data in the post.
Thanks !!
Hi KB, I just want to thank from bottom of my heart. It was very informative, very useful and super easy to understand.
Thanks again.
Thank you very much Thayz 🙂
do you teach hybris
ya did it few months back..
CMSParagraphComponent is not rendering the HTML tags
Please share the content that you are adding in paragraph component, if its sensitive data you just send me “xyz” in place of content.
Hi
In step 4 “Run both the cms-content.impex files and make sure its imported successfully” What do you mean by Run? do i need to import cms-content.impex using ImpEx import editor in hac. is there any ant command there to do the same.
I followed above steps, not able to see the “Welcome … ” string.
Thanks
mohan
In Hybris,we can import impex in many ways(HAC,through code etc).
Either you configure it to run automatically during Initialize or update time. or you can also run it through HAC.
Generally these cms related impexes are configured to run during initalize and update time.
If the impex is imported successfully, then that step is done.
Please provide me the details if you are getting any errors.
Thanks!!
Hi KB
I have resolved the error. My mistake, I was updating cms-content.impex of coredata rather than sampleData 🙂
updating in coredata
hybris\bin\ext-data\apparelstore\resources\apparelstore\import\coredata\contentCatalogs\apparel-ukContentCatalog\cms-content.impex
instead updating in sampledata.
hybris\bin\ext-data\apparelstore\resources\apparelstore\import\sampledata\contentCatalogs\apparel-ukContentCatalog\cms-content.impex.
Its working now. Thanks
Mohan
That’s great Mohan !! Happy learning
Hi,
its required any additional extension or it will come by default, please explain me.
Hi,
Which recipe you have installed ?
If you would have installed b2c_asm , it would have installed ASM automatically.
Or you can also install as addon.
What did u follow ?
Hi,
i am getting below error, please help on this.
WARN [hybrisHTTP18] [DefaultCMSComponentRendererRegistry] Error processing component tag. currentComponent [AssistedServiceComponentModel (8796124906556@1)] exception: File "/WEB-INF/views/respo
nsive/cms/assistedservicecomponent.jsp" not found
Hi,
check whether you have assistedservicecomponent.jsp is present or not in your code base.
I think your ASM module is not installed properly it seems.
1)ant addoninstall -Daddonnames=”assistedservicestorefront” -DaddonStorefront.yacceleratorstorefront=”customstorefront” 2)add assistedservicestorefront extension to your local extension.xml 3)for the assisted service component to be rendered in the header part of your storefront, there will be impex in “cms-responsive-content.impex” initialdata extension