Creating new Solr Core
What is Solr Core ?
A Solr core is basically an index of the text and fields found in documents that we publish to Solr.
A single Solr instance can contain multiple cores, which are separate from each other based on local criteria.
In my project, If i have 2 databases and I may decide to use separate core for each database.
Each core will have its own configuration and indexed data storage location.
When the Solr server runs in a standalone mode, this configuration is called Core
When the solr server runs in a Cloud mode, this configuration is called Collection
This core folder will contain all the configurations and indexed data.
Let’s create a Core configuration for Standalone server
We can create the Core using the solr create command
Navigate to the solr-6.2.0\bin folder in command prompt
And run the below command
solr create –c MyCore
Now navigate to the solr-6.2.0\server\solr
We can see MyCore folder is created and this folder can be used as configuration folder for our indexing.
We can see 2 folders called conf(used for configuration) and data(used for storing indexed data) folders and core.properties file which contains the name of the core inside the MyCore folder.
Lets Understand Core concept and make some changes in MyCore
Every core needs to have 4 important files listed below
1)solr.xml
2)solrconfig.xml
3)schema.xml
4)core.properties
1)solr.xml
This file will be in the same place where our new MyCore folder is located.
This file should be used to configure the Solr Cores.
2)solrconfig.xml
This file will be automatically created when we run Solr Create command and available inside MyCore/conf directory.
This file is used to configure the Solr server in a high level
For example, we can change the location of data directory in this file and Lucene details are added in this file.
At the end of this file before < /config > tag add the below line
- <schemaFactory class="ClassicIndexSchemaFactory"/>
<schemaFactory class="ClassicIndexSchemaFactory"/>
This enables to use Schema mode where we can use schema.xml for manually editing the schema xml file for defining our own field types description.
3)schema.xml
The file will be generated as managed-schema.xml when we create a new core as by default Solr uses Schemaless mode.
Managed-schema.xml is available inside MyCore/conf directory.
Rename this file to schema.xml as we have done the configuration change in solrconfig.xml to use Schema mode
.
Managed-schema.xml should be used if we are using schemaless mode which is by default enabled in Solr.
This file contains the description of the fields that we pass to solr for indexing.
4)core.properties
This file will be automatically created when we run Solr Create command and available inside MyCore directory.
This file is used to define the properties used by our Core like Core Name,solr config,schema file etc
If we don’t add any values inside this core.properties ,default values will be taken automatically.
Since we have changed some of the configuration details, restart the Solr server.
Navigate to below path in command prompt
solr-6.2.0\bin
Stop the Solr server using below command
Solr stop –all
Start the Solr server now using below command
Solr start
Let’s access the solr through web using below url and check whether core is listed or not in the core selector
http://localhost:8983/
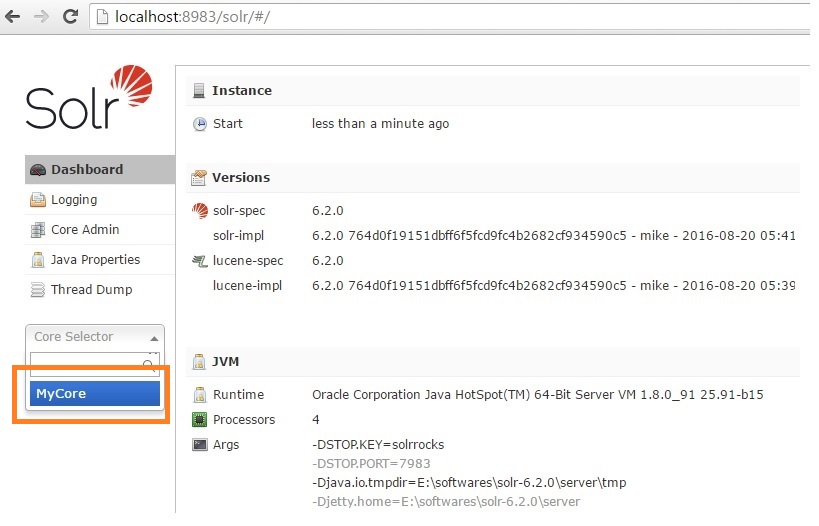
We can see that our new solr core called MyCore is listed.
Now we can use this MyCore as a configuration for our indexing.

Hi KB,
After performing the steps, I am unable to see the Num docs as 10, its still showing 0. However I tried multiple times. Please help
Hello,
Thanks for all your tutorials on Hybris and Solr.
While creating the new core, I’m getting the below error:
C:\hybris\hybris\bin\ext-commerce\solrserver\resources\solr\bin>solr create -c mycore
ERROR: Specified config directory data_driven_schema_configs not found in C:\hybris\hybris\bin\ext-commerce\solrserver\resources\solr\server\solr\configsets
Thanks & Regards,
Jaya
i do see the same problem. Please let me know if you alredy got a solution.